Bathroom Floor Leveling, 25 Things You Should Know
Are you tired of those annoying splashes in your uneven bathroom? A poorly leveled floor disrupts the aesthetics and poses risks for water damage, drainage issues, and even accidents. In this insightful blog post on “Bathroom Floor Leveling,” I will guide you through the necessary steps to correct those uneven surfaces and enhance your bathroom’s overall appearance and safety.
Bathroom floor leveling:
Bathroom floor leveling is crucial in ensuring a safe and stable base for your flooring materials, addressing water leakage, cracking, and instability. Uneven bathroom floors can result from settling, water damage, poor construction, or age. Common leveling techniques include self-leveling compounds, plywood underlayment, and mud beds. A successful leveling project involves proper surface preparation, using a primer, and quality materials.
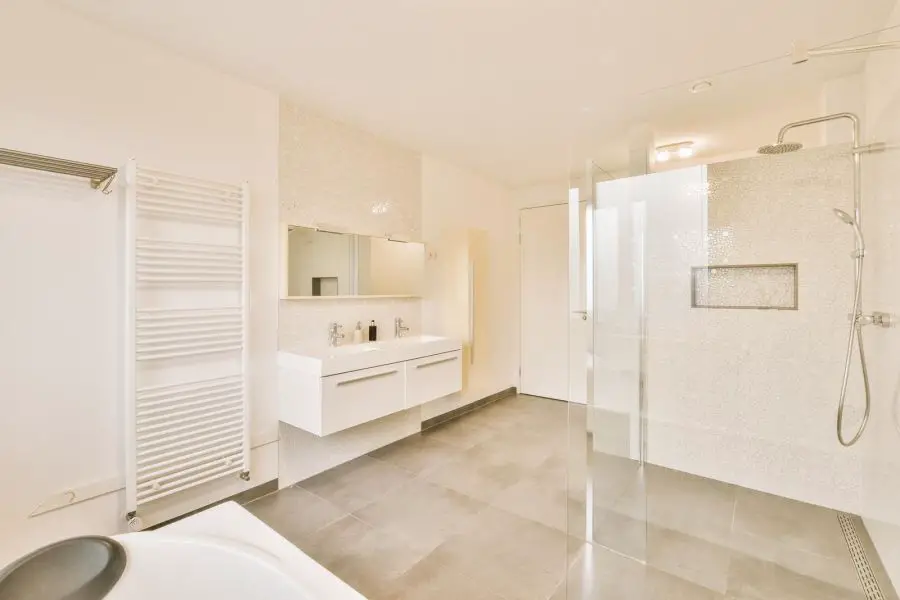
The bathroom floor leveling process ensures a stable, even surface for your stylish new flooring. Discover preparation techniques, top-notch materials, and step-by-step guidance for achieving a perfectly leveled surface that transforms your bathroom into a stunning sanctuary.
Contents
- 1 Bathroom Floor Leveling and Alignment Process
- 2 How to Correctly Level an Uneven Bathroom Floor?
- 3 What Materials or Tools Can Be Utilized for Leveling a Bathroom Floor?
- 4 What is the Most Efficient Method to Level a Bathroom Floor?
- 5 What is the Cost Involved in Leveling a Bathroom Floor?
Bathroom Floor Leveling and Alignment Process
As a seasoned professional in the field of home improvement, I have seen my fair share of uneven bathroom floors. I will share my knowledge on bathroom floor leveling, including why leveling is important, the various methods available, and some tips and recommendations from my personal experience.
Let’s dive in and learn how to level your bathroom floor like a pro.
• What is Bathroom Floor Leveling
Bathroom floor leveling is the process of ensuring your bathroom floor is flat and even, making it safe and providing a solid base for tiles or other flooring materials. An uneven bathroom floor can lead to various issues, such as water pooling and leakage, cracking, and even causing instability or safety hazards underfoot.
It is, therefore, essential to identify any uneven areas in your bathroom floor, especially during renovation or new construction projects, and apply suitable leveling techniques.
• Common Causes of Uneven Bathroom Floors
- Settling: Over time, a house settles, and its foundation may shift, resulting in the bathroom floors becoming uneven or sloped.
- Water damage: Moisture seeping into the subfloor of a bathroom can cause swelling and warping of the floor, resulting in an uneven surface.
- Poor construction: If the subfloor or flooring materials are not installed correctly, it may lead to an uneven bathroom floor.
- Age of the house: Older homes tend to experience more settling and may have uneven floors.
• Bathroom Floor Leveling Techniques
When leveling an uneven bathroom floor, there are several methods to consider, depending on the cause and severity of the problem. Here are some common techniques:
– Self-Leveling Compounds
These polymer-modified cementitious products are mixed with water and poured onto the floor. They flow out and find their own level, creating an even surface. This method is suitable for small to moderate unevenness and is ideal for concrete or plywood subfloors.
Pros:
- Easy to use
- Fast setting
- Provides a smooth surface for tiling
Cons:
- Can be expensive
- Not suitable for extreme leveling
– Plywood Underlayment
Installing a plywood underlayment can help level a slightly uneven subfloor. Depending on the severity of the slope, multiple plywood layers or tapered wedges may be needed to create a level surface.
Pros:
- Can be more cost-effective than self-leveling compounds
- Provides a sturdy base for flooring materials
Cons:
- Not suitable for extreme leveling
- May increase the overall height of the bathroom floor
– Mud Bed
A mud bed, a mortar bed or dry pack, is a mixture of sand, cement, and water applied directly onto the subfloor. A straight-edged trowel is used to screed it into the desired thickness, then left to cure. This method is suitable for leveling uneven concrete or tiled floors with moderate to significant slopes.
Pros:
- Can level out significant unevenness
- Provides a strong, durable base for tiling
Cons:
- Labor-intensive
- Requires skill and experience
• Tips for a Successful Floor Leveling Project
From years of experience, I have gained valuable knowledge that has proven instrumental in ensuring the success of bathroom floor leveling projects. Here are some of the tips I would like to share with you:
– Proper Surface Preparation
Thoroughly clean the subfloor of any debris, dust, or old adhesive. Additionally, ensure any holes or gaps are filled in before leveling, ensuring a continuous surface for the leveling materials to work on.
– Use of Primer
Before applying any self-leveling compounds or mud beds, it is essential to use a primer on the subfloor. A primer will promote adhesion between the subfloor and leveling material, preventing potential failures.
– Use Quality Materials
Always use high-quality leveling products and flooring materials to ensure the durability and longevity of the leveled bathroom floor.
– Hire Professionals
If you are not confident in taking on a bathroom floor leveling project yourself, it is best to seek the assistance of a professional with the knowledge, experience, and tools necessary to complete the job.
• Conclusion
Uneven bathroom floors can be a common problem in homes, and bathroom floor leveling is essential to ensure a safe, stable, and durable surface for flooring materials. Various leveling techniques, such as self-leveling compounds, plywood underlayment, or mud beds, can even out the floor.
When undertaking a bathroom floor leveling project, proper surface preparation, the use of a primer, and quality materials are critical factors in ensuring a successful and long-lasting result.
How to Correctly Level an Uneven Bathroom Floor?
Uneven bathroom floors can be a headache for homeowners, causing discomfort and posing potential dangers.
However, uneven floor leveling is critical when remodeling or installing new flooring. I will cover the methods and techniques for leveling an uneven bathroom floor, offering practical advice and recommendations that are easy to follow.
• Identifying the Causes of Uneven Bathroom Floors
There are several reasons why a bathroom floor might be uneven, and it is essential to address the root cause of the problem before proceeding. Some common causes of uneven floors include:
– Subfloor Issues
A poorly constructed or damaged subfloor can cause bathroom floors to become uneven. Inspect the subfloor to ensure it is in good condition and properly supported. If there are any visible signs of damage, a repair or complete replacement might be necessary.
– Water Damage
Excessive moisture or water leaks can cause the bathroom floor to become uneven. Identify the source of moisture and address it immediately. If water damage is extensive, professional help might be required.
– Settling or Foundation Issues
A house settling over time or inadequate foundation support can cause the bathroom floor to become uneven. Consult a structural engineer or foundation specialist to address these issues, as they often require professional intervention.
• Leveling Options
There are various methods one can use to level an uneven bathroom floor. These include self-leveling compounds, plywood or OSB sheets, and floor-leveling systems. The following sections will explore each option in detail.
– Self-Leveling Compounds
Self-leveling compounds are widely used to level uneven surfaces, especially concrete-based floors. They are a popular choice for their ease of use and quick-setting times.
Tools and Materials
- Self-leveling compound
- Mixing bucket
- Drill with mixing paddle attachment
- Leveling trowel
- Primer (if required by the compound manufacturer)
Step-by-Step Instructions
- Prepare the Surface: Clean the bathroom floor, ensuring it is free of dirt, debris, or loose materials. Remove any existing flooring, such as tiles or linoleum, to expose the subfloor.
- Apply Primer (if required): Follow the manufacturer’s instructions for applying primer to the floor. Ensure adequate drying time before proceeding to the next step.
- Mix Self-Leveling Compound: In a mixing bucket, combine the self-leveling compound with water per the manufacturer’s guidelines. Use a drill with a mixing paddle attachment to achieve a smooth, lump-free consistency.
- Pour Compound: Working from one corner of the room, pour the self-leveling compound onto the floor in a continuous, even motion. The compound will begin to level itself, but you can use a leveling trowel to help spread the material if necessary.
- Allow the Compound to Set: Observe the manufacturer’s recommended drying time, typically around 24 hours, before walking on or installing new flooring over the leveled surface.
– Plywood or OSB Sheets
Using plywood or oriented strand board (OSB) sheets is another method to level uneven bathroom floors, particularly in cases involving wooden subfloors.
Tools and Materials
- Plywood or OSB sheets (at least -inch thick)
- Circular saw
- Level
- Hammer and nails or screwdriver and screws
Step-by-Step Instructions
- Remove Existing Flooring: Remove any current flooring materials, such as tiles or linoleum, to expose the subfloor.
- Cut Plywood or OSB Sheets to Size: Measure the room to determine the required dimensions for the plywood or OSB sheets. Use a circular saw to cut the sheets to the appropriate size.
- Install Sheets over Subfloor: Begin by installing a sheet of plywood or OSB in one corner of the room. Ensure the edges are flush and check that the surface is level. Secure the sheet to the subfloor using nails or screws, ensuring they are spaced about every 8 inches along the perimeter and center.
- Apply Additional Sheets as Needed: Continue to install sheets, ensuring that seams are staggered and maintaining a tight, level fit. Once all the sheets have been installed, the bathroom floor should be adequately leveled.
– Floor Leveling Systems
Floor leveling systems are a more intricate option for leveling uneven bathroom floors. These systems involve adjustable supports that raise the floor to create a level surface.
Tools and Materials
- Floor leveling system (consisting of adjustable support pedestals and beams)
- Level
- Tape measure
- Shims (if required)
Step-by-Step Instructions
- Consult Manufacturer’s Guidelines: Each floor leveling system has specific installation guidelines, so consult the manufacturer’s instructions before proceeding.
- Install Support Pedestals and Beams: Position the adjustable support pedestals and beams per the manufacturer’s recommendations. Generally, support pedestals should be placed about 16 inches apart, and beams positioned perpendicular to the joists.
- Check for Level: Use a level to ensure that the installed supports and beams create a flat, level surface. Adjust the support pedestals as necessary to achieve a level plane.
- Install Flooring Material: Proceed with installing the chosen flooring material now that the bathroom floor is level. Depending on the leveling system used, it may be necessary to shim the flooring to compensate for minute discrepancies in level.
• Conclusion
An uneven bathroom floor can be a cause for concern, but one of the methods explained in this blog post should provide a solution that suits your needs. Whether employing a self-leveling compound, plywood or OSB sheets, or a floor leveling system, following the proper steps and guidelines will ensure a satisfactory result.
This step-by-step approach will help homeowners create a leveled bathroom floor ready for installing new flooring or other remodeling endeavors.
What Materials or Tools Can Be Utilized for Leveling a Bathroom Floor?
Bathroom floors are bound to suffer from wear and tear over time. They can become uneven or develop low spots, causing water to stagnate and damage the subfloor. To avoid such issues, ensuring your bathroom floor is level is important.
We will learn about different materials and techniques to level a bathroom floor effectively.
• Self-Leveling Compounds
One of the most popular methods for leveling a bathroom floor is using self-leveling compounds. These compounds are cement-based mixtures that spread and level themselves when poured onto a surface. Here’s how to use a self-leveling compound:
- Clean the floor: Ensure the bathroom floor is clean, dry, and free of debris, dust, or grease. Remove any loose or peeling paint, adhesives, or old tile.
- Prime the floor: Apply a suitable primer designed for self-leveling compounds. This will help the compound to bond better with the floor and provide a stronger finished surface.
- Mix the compound: Measure and mix the self-leveling compound according to the manufacturer’s instructions. Generally, you’ll need to mix water and the compound in a large bucket using an electric drill with a mixing paddle attachment.
- Pour the compound: Starting from the deepest part of the floor, pour the mixture onto the floor. The compound will spread independently, filling any low spots and leveling itself.
- Allow to dry: Once the floor is covered, allow the compound to dry according to the manufacturer’s instructions, usually for at least 24 hours.
While self-leveling compounds are a very effective method to level bathroom floors, following the manufacturer’s instructions for mixing ratios and drying times is crucial.
Additionally, although the compound should level itself, using a long, straight edge like a screed or trowel is a good idea to help guide the process.
• Plywood and Fiber Cement Board
Sometimes, bathroom floors require more extensive repair, especially if they have suffered significant water damage. In such cases, you can use plywood or fiber cement board to level the floor by creating a new, more even subfloor layer.
– Plywood
Plywood is an economical choice for leveling bathroom floors. When installing a plywood subfloor, it is essential to:
- Measure and cut the plywood sheets to fit the bathroom floor, ensuring the edges meet along the joists.
- Ensure the plywood is exterior-grade, at least an inch thick, and properly treated to resist moisture.
- Stagger the seams between the plywood sheets to enhance the floor’s stability.
- Secure the plywood sheets to the floor joists using corrosion-resistant screws, spacing them about 8 inches apart along the edges and within 12 inches in the field of the plywood.
- Fill any gaps or seams between the plywood sheets with a suitable floor patching compound to create a smooth, even surface.
Remember that plywood is not waterproof, and exposure to excessive moisture can lead to warping or damage; thus, it is vital to use a moisture-resistant flooring material, such as tile or vinyl, on top of the plywood subfloor.
– Fiber Cement Board
Fiber cement board is a more durable and moisture-resistant option for leveling bathroom floors. To properly install a fiber cement board subfloor, you should:
- Measure and cut the fiber cement board pieces to fit your bathroom floor.
- Apply a layer of thin-set mortar to the existing subfloor and comb it using a notched trowel.
- Lay the fiber cement board pieces onto the thin-set mortar, offsetting their seams from existing subfloor seams.
- Fasten the boards to the subfloor using corrosion-resistant screws or galvanized roofing nails, spacing them about 8 inches apart.
- Fill the seams and screw holes with thin-set mortar and cover them with alkali-resistant mesh tape.
Fiber cement board provides a stable, moisture-resistant surface ideal for tile installation, ensuring your bathroom floor remains level and protected from water damage.
• Use of a Professional Leveling System
Investing in a professional leveling system for uneven bathroom floors, especially larger spaces, may be worth it. These systems typically consist of reusable clips and wedges that help keep tiles perfectly level while allowing for small adjustments during the installation process.
Though professional leveling systems may require a larger initial investment, they can save time and effort during the tile installation process, providing a perfectly level final result that can be challenging to achieve using other leveling methods. Additionally, they can be used for multiple home improvement projects, making them a smart investment for homeowners who plan to make updates throughout their homes.
In conclusion, several methods and materials are available to effectively level bathroom floors. The choice you make should depend on the specific situation of your floor, your budget, and your personal preferences.
Self-leveling compounds, plywood, and fiber cement board all offer unique advantages, while the professional leveling system may be worth considering to achieve a perfectly level floor with minimal effort.
Regardless of your chosen method, always follow manufacturer guidelines and take any necessary precautions to ensure a successful bathroom flooring project.
What is the Most Efficient Method to Level a Bathroom Floor?
Bathroom floors can become uneven over time due to various factors such as settling foundations, wear, and tear, or improper installation. If you’re planning a bathroom renovation or want to improve the overall quality of your home, leveling your bathroom floor is a necessary step.
I will discuss the easiest way to level a bathroom floor and provide you with tips and recommendations to ensure a successful project.
• Assess the Situation
Before you begin leveling your bathroom floor, it’s important to identify what’s causing the unevenness. Some common causes include:
- Excess moisture causes the floor to warp
- Settling foundation
- Improper installation or poor-quality materials
Carefully look at your bathroom floor and determine the root cause of the problem. This will help you better understand the project’s scope and determine the best way to proceed.
• Choose a Method
Several methods are available for leveling a bathroom floor, each with pros and cons. In most cases, one of the following approaches will be the easiest and most effective:
– Using a Self-Leveling Compound
A self-leveling compound is a liquid material you pour onto your bathroom floor. As it dries, it levels out, creating a perfectly flat surface. This method works best for floors that are only slightly uneven and require minimal leveling.
Pros:
- Fast and easy application
- Dries quickly
- Works well for small-scale leveling projects
Cons:
- Limited effectiveness on severely uneven floors
- Requires thorough surface preparation
– Installing a Leveling Underlayment
A leveling underlayment is a thin layer of material, typically a cement-based product, that’s applied over your existing bathroom floor to create a flat surface. This method is most effective for floors that are moderate to severely uneven.
Pros:
- Provides a more substantial solution for uneven floors
- Can be used to address a variety of leveling issues
- Can be installed over various types of flooring materials
Cons:
- Requires more skill and time to install
- Involves additional costs for underlayment materials
• Gather Your Tools and Materials
Regardless of your chosen method, you’ll need some basic tools and materials to get started. These include:
- Level
- Measuring tape
- Mixing bucket and paddle or trowel
- Appropriate leveling compound or underlayment
- Plastic sheeting (for protecting fixtures and surfaces)
Follow the manufacturer’s recommendations for your chosen leveling product, as specific instructions and material requirements may vary.
• Prepare Your Bathroom Floor
Before you can level your bathroom floor, you’ll need to prepare the surface:
- Remove any furniture, fixtures, and bathroom accessories from the room.
- Protect any remaining fixtures with plastic sheeting, such as faucets and showerheads.
- Thoroughly clean the floor, removing any dirt, dust, or debris. If there’s any adhesive residue or old flooring material present, it should be removed as well.
• Apply the Leveling Compound or Underlayment
Now that your bathroom floor is prepared, it’s time to apply your chosen leveling material:
– Self-Leveling Compound
- Mix the self-leveling compound according to the manufacturer’s instructions.
- Pour the compound onto the low spots on your bathroom floor.
- Use a trowel or paddle to gently spread the compound, allowing it to level itself out. Be careful not to overwork the compound, as this can prevent it from leveling properly.
- Allow the compound to dry according to the manufacturer’s instructions, typically 24 to 48 hours.
– Leveling Underlayment
- Mix the underlayment according to the manufacturer’s instructions. Mix only enough for the area you plan to cover in a single work session.
- Start at one end of the room, and apply the underlayment using your trowel, working across the floor. Maintain a consistent thickness, typically around 1/8 to 1/4 inch.
- Use your level to ensure the underlayment is even and smooth. Make any necessary adjustments before the underlayment dries.
- Allow the underlayment to dry according to the manufacturer’s instructions, typically 24 to 48 hours.
• Final Steps
After your leveling compound or underlayment has dried, you must confirm that your bathroom floor is leveled. Use a level to check various points throughout the room. If you find any remaining unevenness, you may need to apply additional compound or underlayment as needed.
Once your bathroom floor is level, you can proceed with your planned renovations, such as installing new flooring or reinstalling fixtures.
• Conclusion
Leveling your bathroom floor doesn’t have to be a complicated or time-consuming task. By assessing the situation, choosing the right method, and following these straightforward steps, you can effectively and easily level your bathroom floor for a more enjoyable and functional space.
What is the Cost Involved in Leveling a Bathroom Floor?
When planning a bathroom renovation, one of the most critical aspects is leveling the bathroom floor. An uneven floor can lead to various issues, such as water pooling and potentially causing water damage or mold. It can also cause difficulties while installing bathroom fixtures like bathtubs, showers, and toilets.
I will discuss the factors affecting the cost of leveling a bathroom floor and provide useful tips on managing this expense.
• Factors Affecting the Cost of Leveling a Bathroom Floor
Before diving into the actual costs, it’s essential to understand the factors that can influence the leveling process’s price. These may vary depending on your bathroom’s existing conditions and the materials involved. Some of the factors are:
– Current Floor Conditions
The existing floor’s condition is a significant factor that can impact the cost of leveling your bathroom. If your bathroom floor is severely damaged, worn out, or uneven, it will require more work, materials, and effort to level it. This consequently translates into higher expenses.
– Floor Material
The type of material used for your bathroom floor will impact the leveling process’s overall cost. For instance, concrete and tile floors may require different approaches and materials. Concrete flooring must be leveled with a self-leveling compound or through mud jacking or grinding methods.
Tile floors, on the other hand, might require specific repairs or replacement of damaged tiles. Each material and method come with its own set of costs.
– Size of the Bathroom
The bathroom size is another key factor in determining the cost of leveling the floor. The larger the area, the more material and labor are needed, thus increasing the expense.
– Labor Costs
Labor expense significantly affects the overall cost of leveling a bathroom floor. Depending on your region, average labor costs can range from $35 to $75 per hour. Remember that professionals who charge more often have more experience and expertise, which may lead to a faster and higher quality job.
• Common Methods and Their Costs
There are several methods for leveling a bathroom floor, each with cost implications. We will discuss a few common methods and their respective expenses.
– Self-Leveling Compound
A self-leveling compound is a popular option for leveling concrete floors. As the name suggests, it levels the floor by spreading and settling evenly across the surface. This method involves pouring the compound over the existing floor to create a new, even layer. Costs for materials can range from $30 to $50 per 50-pound bag. A typical bathroom renovation might require 2-4 bags.
I recommend hiring a professional for using a self-leveling compound, especially if you have limited experience with floor leveling. This will ensure proper application to avoid any issues with the new floor.
– Mudjacking
Mudjacking is another method commonly used for leveling concrete floors. It involves pumping a slurry mixture of cement and sand underneath the existing floor to lift and level it. This method is more appropriate for severely uneven surfaces.
Mudjacking costs vary depending on the size and extent of the unevenness, but you can expect to pay around $300 to $800 for a bathroom floor.
– Grinding
Grinding is a cost-effective method for mildly uneven concrete floors. This method entails using a grinder to smooth out the high spots on the floor. It’s essential to remember that grinding may not be suitable for severely uneven floors or if the substrate is damaged.
Costs for grinding a bathroom floor can vary depending on the level of unevenness but generally range from $200 to $500.
– Tile Repair or Replacement
For tile bathroom floors, repairing or replacing damaged tiles is often the best approach to addressing unevenness. Costs for this method will depend on the tiles’ quality and the overall extent of the repair job.
• Tips for Reducing Leveling Costs
There are several ways to manage and reduce the cost of leveling your bathroom floor. Here are my recommendations:
- Shop around for labor: Obtain multiple professional quotes to find competitive pricing for leveling your bathroom floor. Check the contractors’ ratings, reviews, and credentials to ensure a quality job.
- Consider DIY: If you have experience and feel confident in your abilities, attempt a DIY floor leveling project to save on labor expenses.
- Bundle projects: If your bathroom renovation includes multiple projects, such as installing a new bathtub and leveling the floor, consider bundling the tasks and negotiating with the contractor to lower costs.
In conclusion, the cost of leveling a bathroom floor heavily depends on various factors, such as floor material, current conditions, and labor expenses.
By exploring different methods, obtaining multiple quotes, and considering ways to save costs, you can ensure a well-leveled bathroom floor that will contribute to a successful and efficient renovation.
Description | Cost |
|---|---|
Self-leveling compound | $30 – $60 per bag |
Labor | $200 – $400 (depending on size and complexity) |
Additional materials (primer, trowel, mixing paddle) | $50 – $100 |
Total cost | $280 – $560 |

